Parts list:
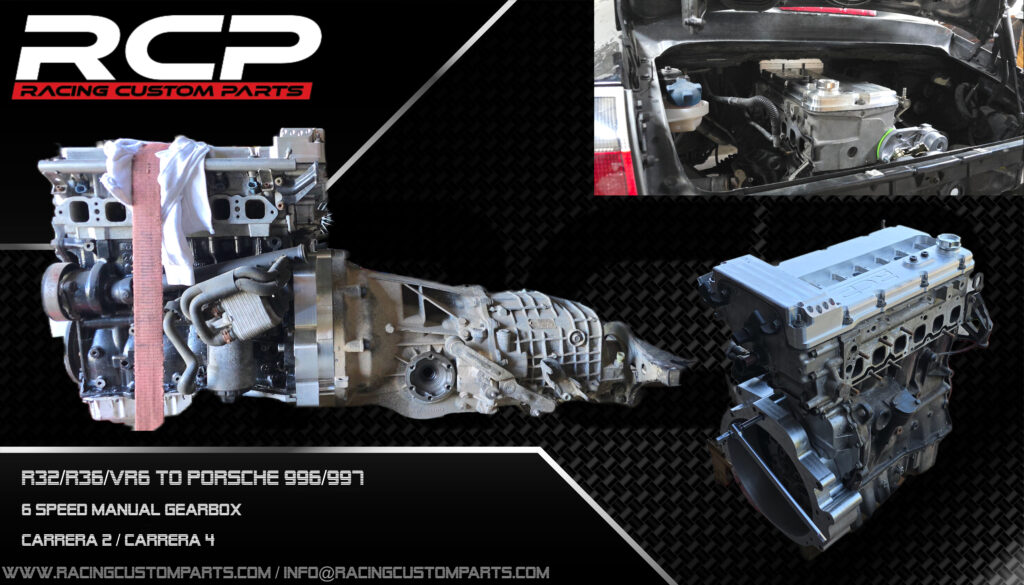
Welcome! In this section of our website, we’d like to introduce one of our more extensive projects — the Porsche 911VRT, our company’s Carrera 4 (996, model year 2000). The car was purchased with a damaged engine specifically for the purpose of performing this kind of modification — a swap to an R32 engine, further reinforced with a Garrett GTX3584RS turbocharger.
The power we’re aiming for — around 700–800 hp — isn’t anything extreme by today’s standards, but as always, all components are being engineered to handle much higher outputs, so there’s nothing stopping anyone from building a project that’s twice as powerful using these same parts.
Since the build is more of a side project, it won’t be completed in just a month or two. However, we’re already receiving so many questions from you that it makes sense to summarize everything in one detailed article.

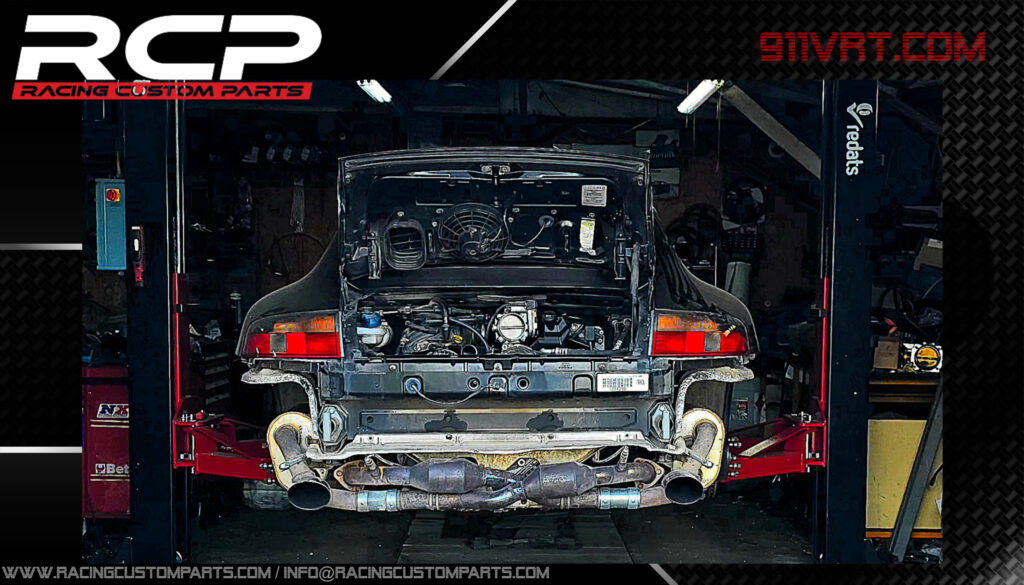
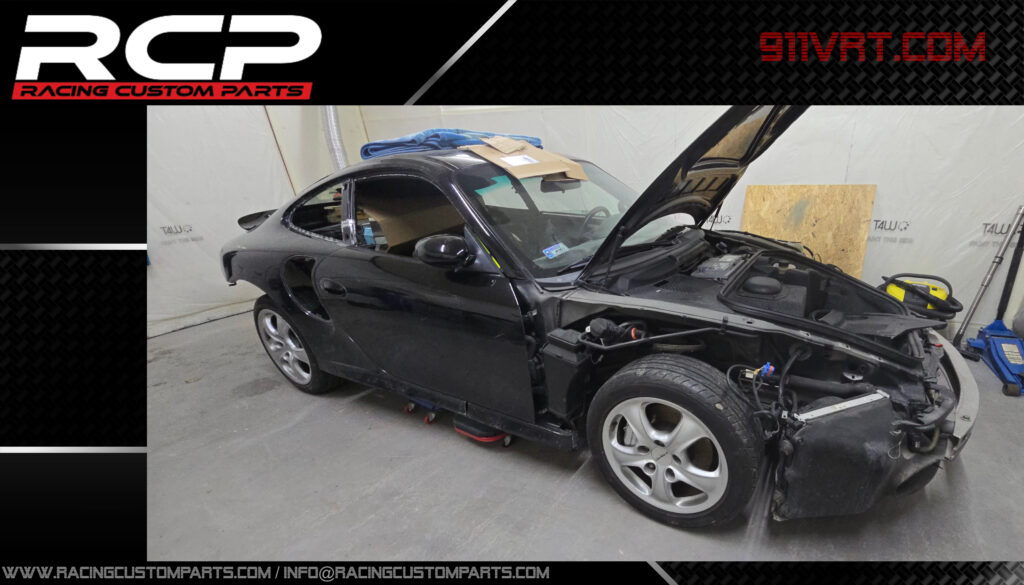
So, first of all, it was necessary to find a suitable base for the modification. This particular car actually had a working engine before the test drive — but that changed on the advice of the previous owner, as during the test drive a connecting rod bearing failed in the original engine.
Far from discouraging me, this actually motivated me to buy this specific car — since, as you can imagine, the purchase conditions changed quite a bit after the bearing failure.
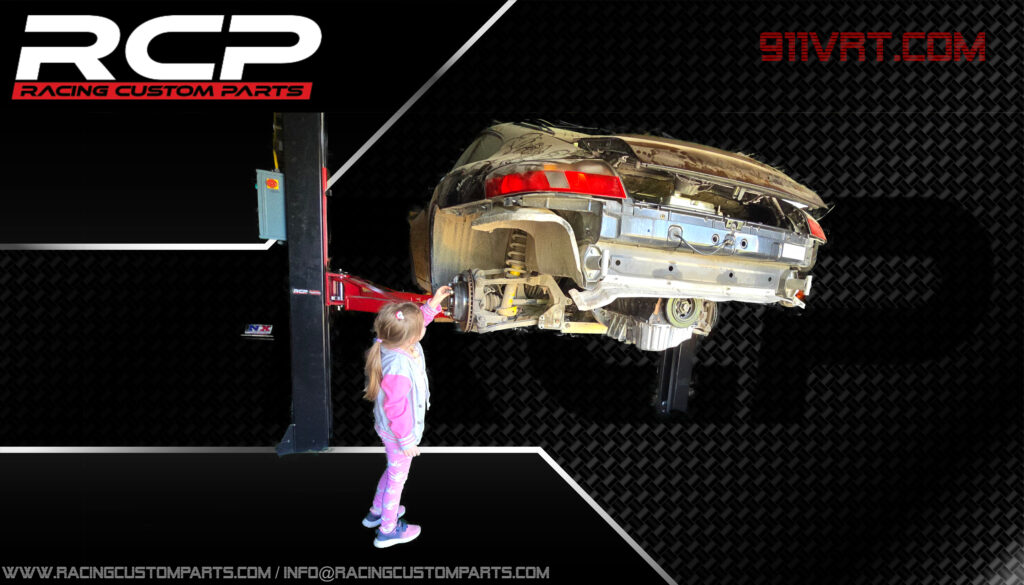
Everything is easer with “little” help and hammer 😉
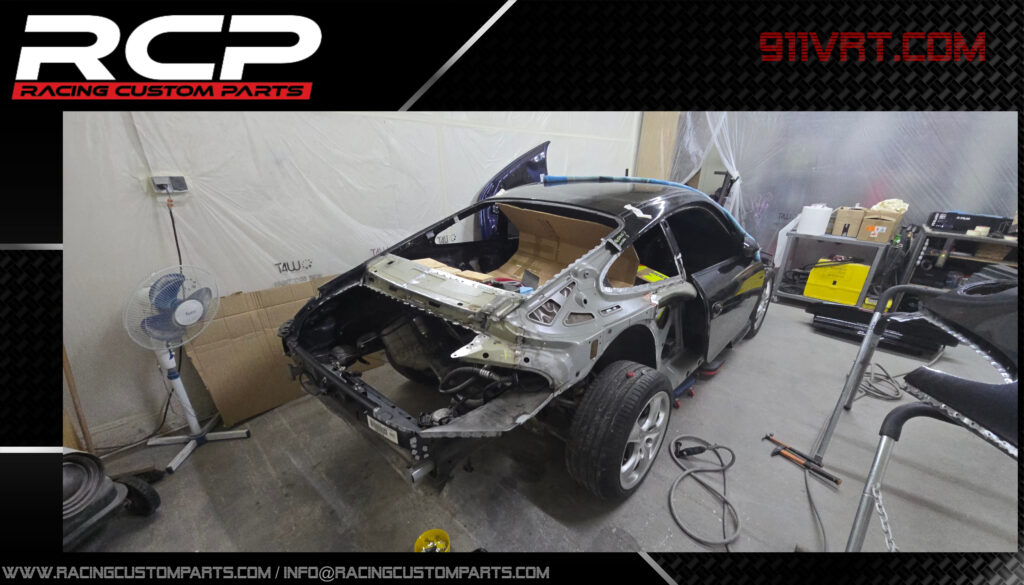
(The car hasn’t been on fire — the white powder is just contrast used for 3D scanning)
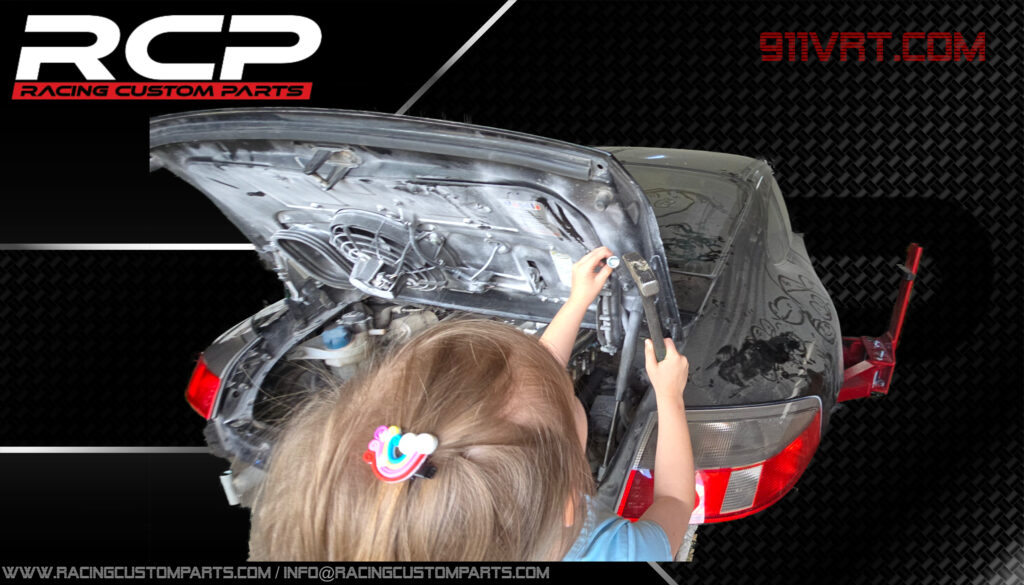
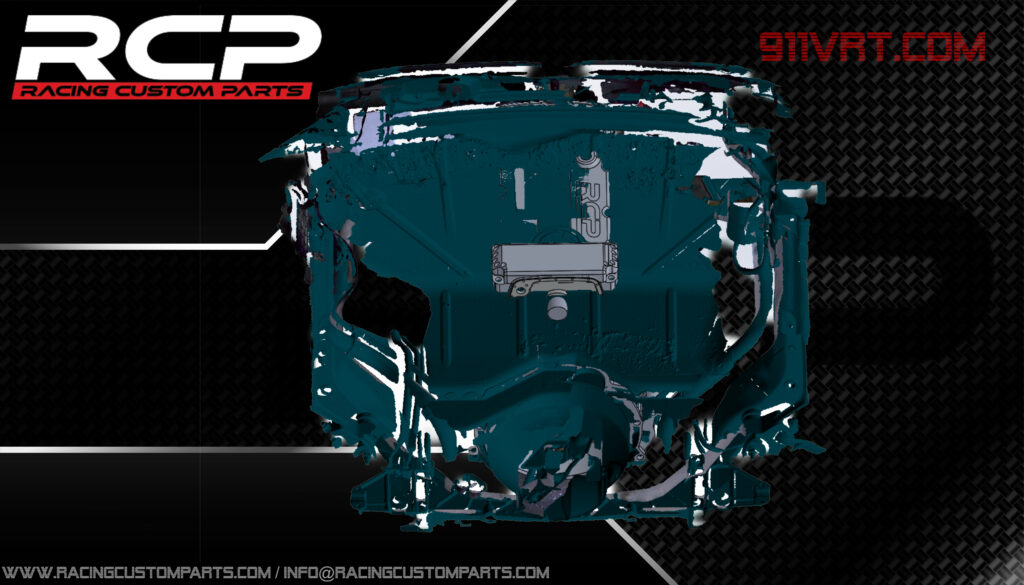
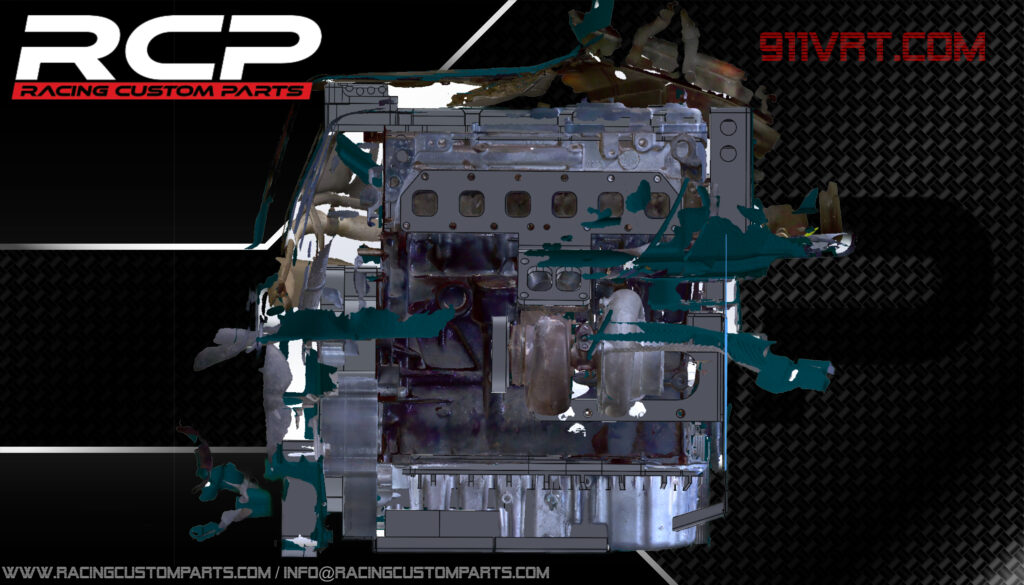
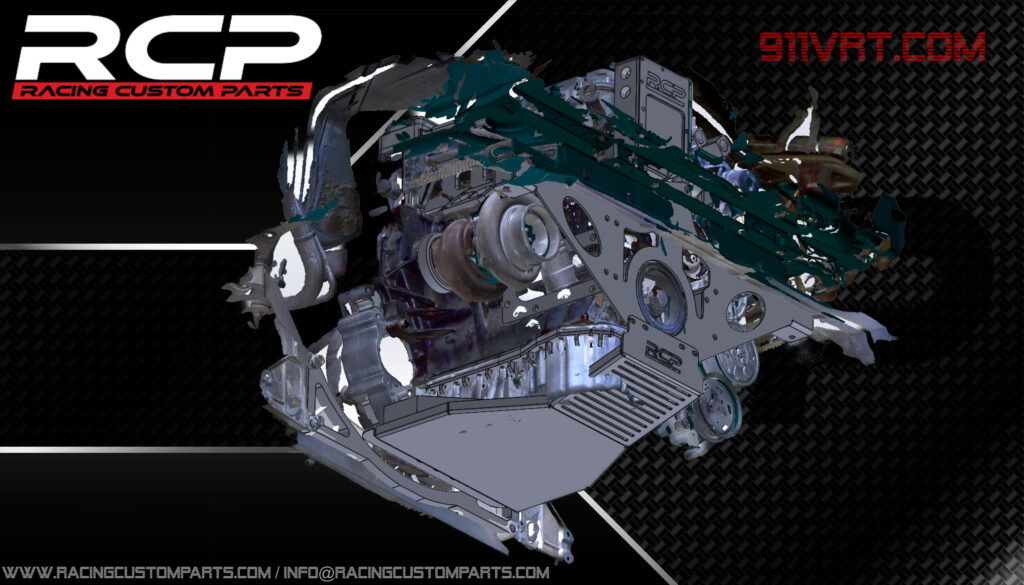
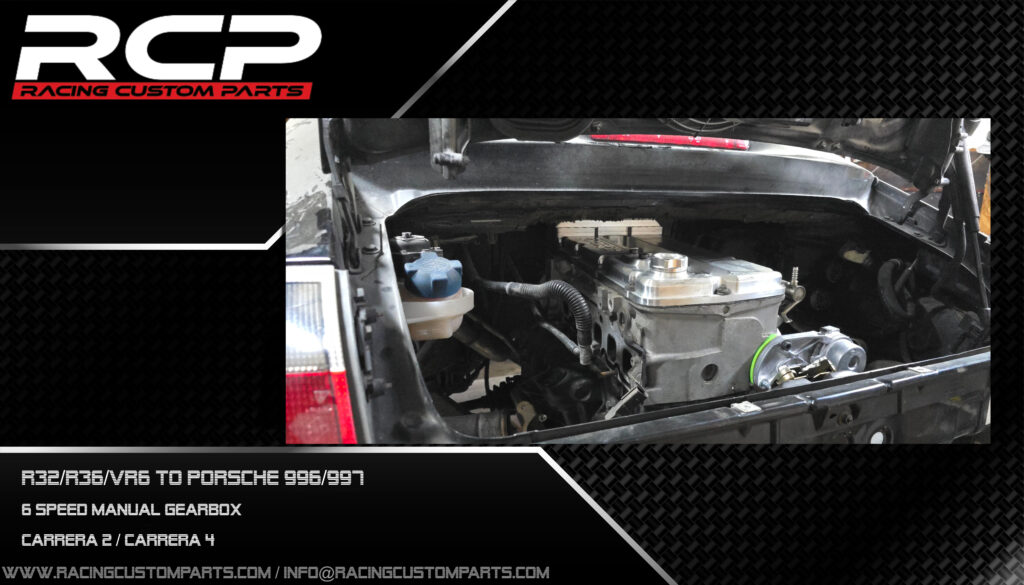
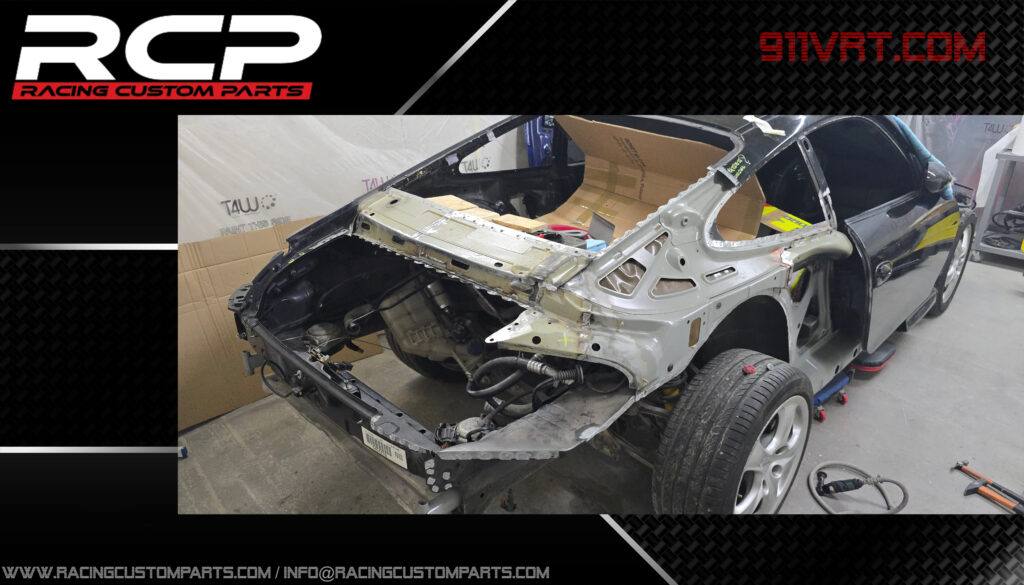
After bringing the car onto the workstation, removing the engine, and performing a 3D scan of the entire engine bay, I began a virtual test fit of placing the R32 engine into the 911’s compartment.
It quickly became clear that the tall R32 engine posed quite a challenge to position correctly within such a low engine bay.
Eventually, I managed to make it work by lowering the engine by 4 cm, which caused the gearbox to tilt slightly downward toward the rear. It’s not an ideal solution, but for those who wish to keep the body completely unmodified, it is unfortunately the only viable option.

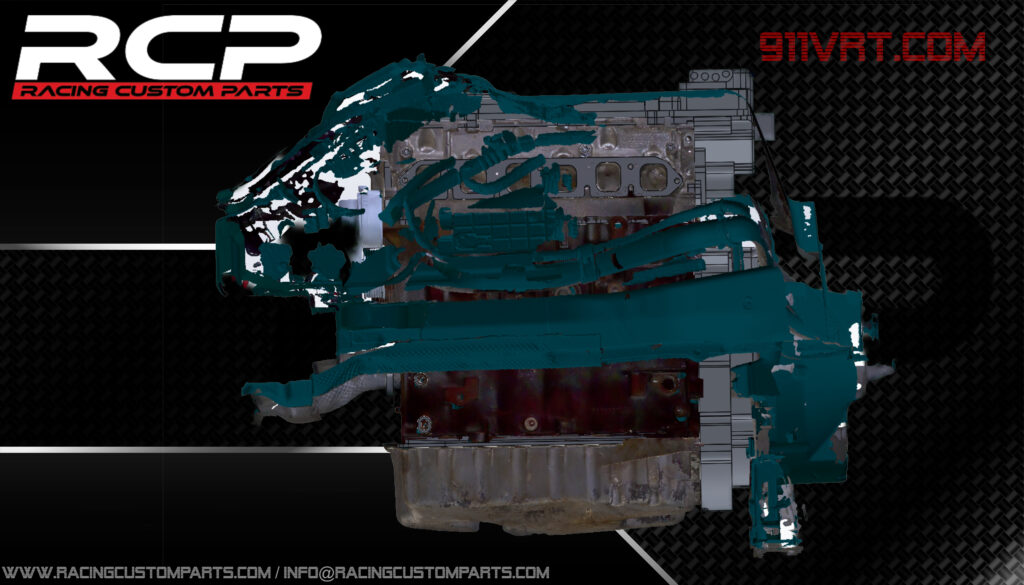
and it doesn’t change much (though it actually helps a lot) — a specially designed ultra-low engine cover made specifically for this car. The options remain the same: either tilt the engine toward the rear or cut the rear shelf to “buy” yourself some extra space.
for now, we’ll stick with option #1 — we’re not cutting our Porsche. This way, we keep the possibility to return to the original engine setup at any time. So, we’re lowering the gearbox by 50 mm. (Here’s an important note: while RWD cars have no issue with this, in the case of AWD versions, the driveshaft will need to be modified to use a constant velocity joint — otherwise, it simply won’t work.)
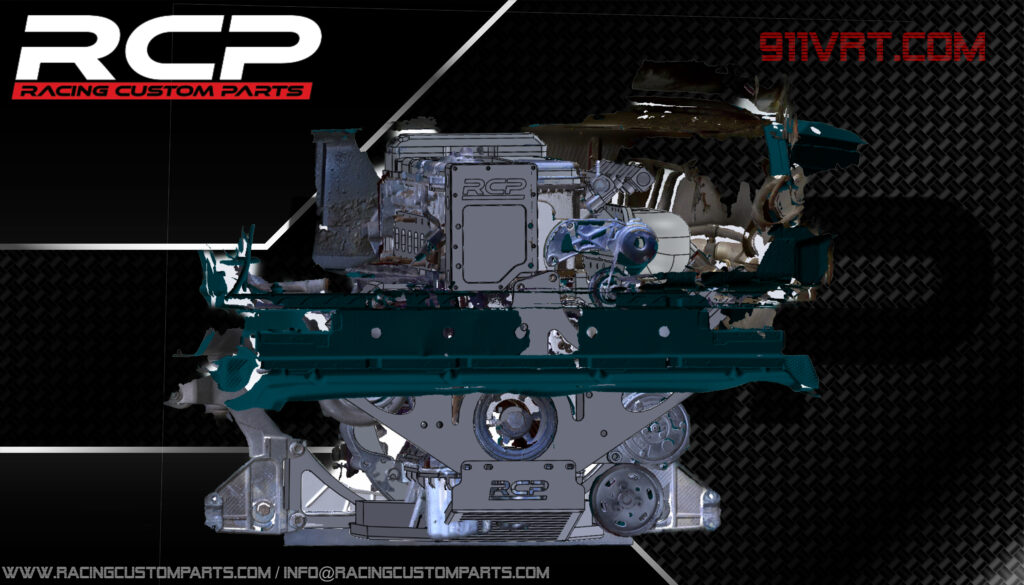
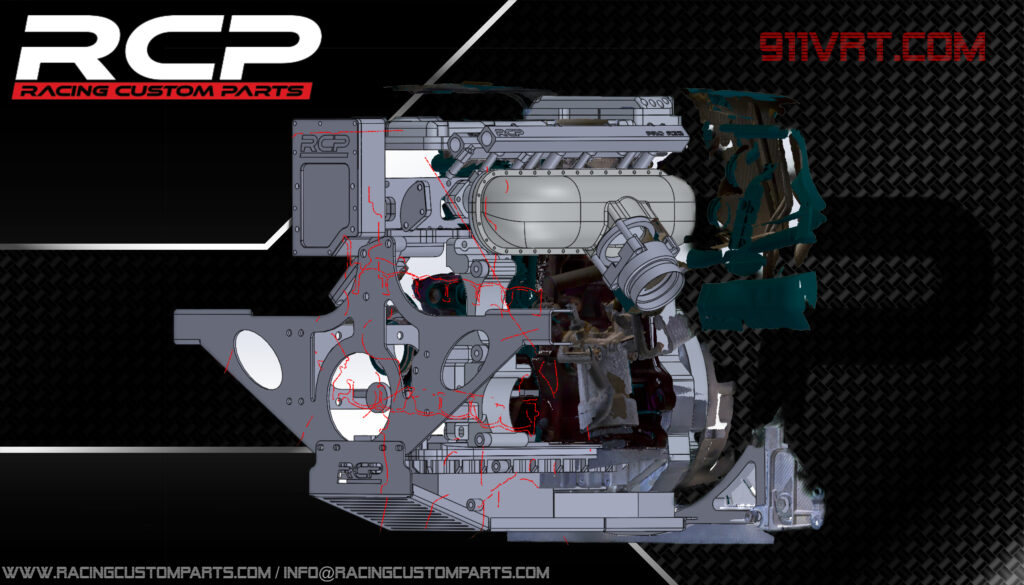
It’s true that the 3D models reveal quite a bit more than what was originally built, but since the project has been ongoing since March 2025 and this description is being written in November, there are some differences between the model and the actual setup. However, as you can see, everything fits — and it doesn’t even look bad. So, enthusiasts who prefer to keep their cars 100% unmodified in terms of bodywork can safely go with this approach.
List of parts needed to complete this project:
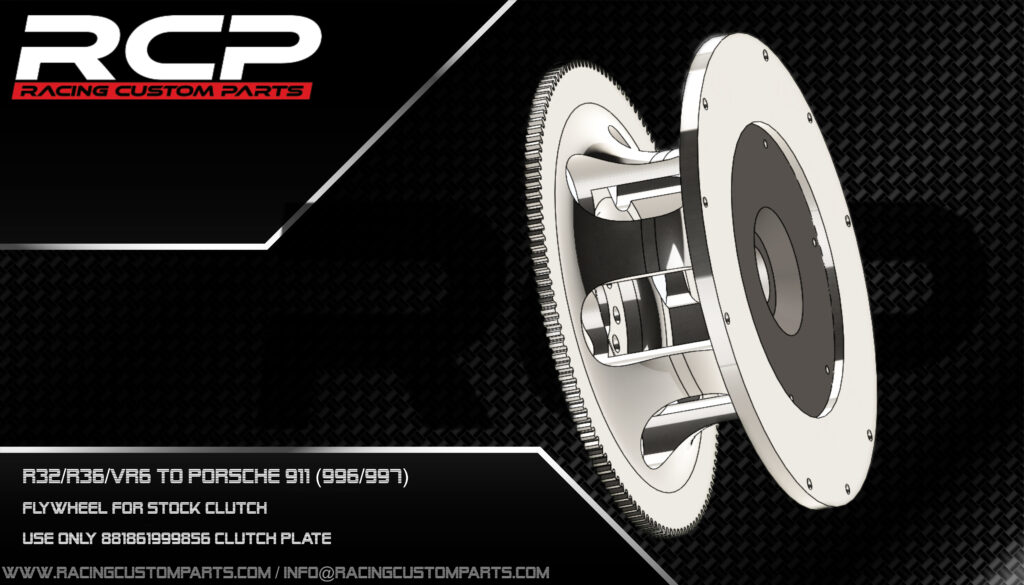
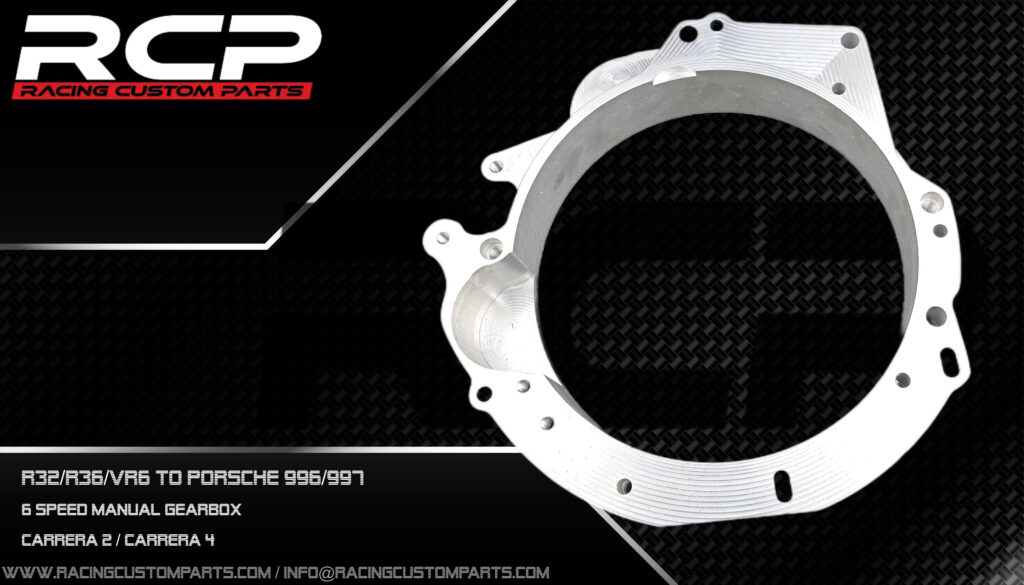
Starting with the basic components — the adapter and the flywheel. The flywheel is currently designed only for the stock 996 clutch, but the final setup for this project will use a Sachs RCS200 clutch kit, capable of handling up to 1550 Nm of torque. (If someone gets ahead of me with their build, I’ll gladly design that flywheel for them earlier — just send me a message 😉)
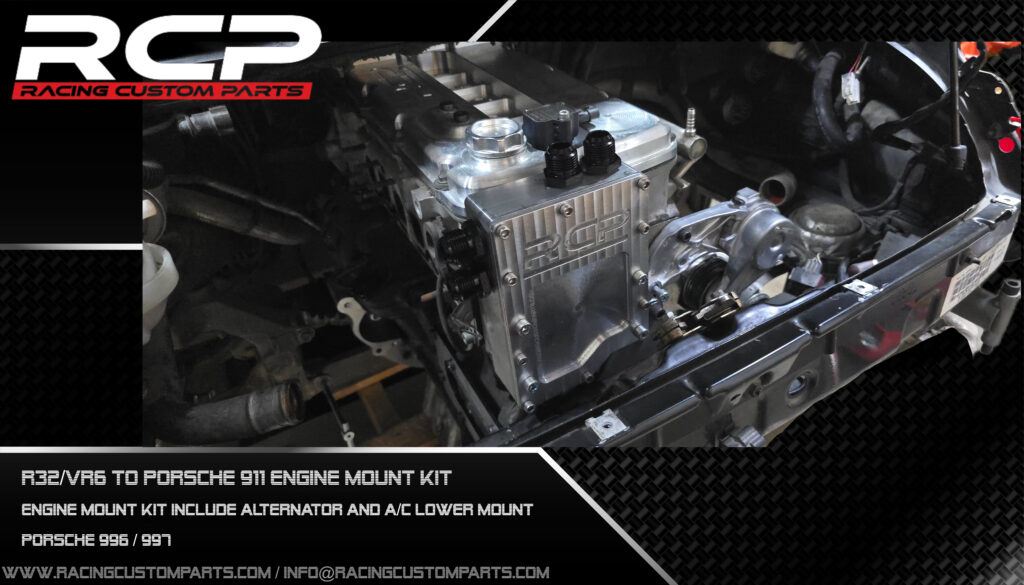
Engine mounting kit for the engine bay.
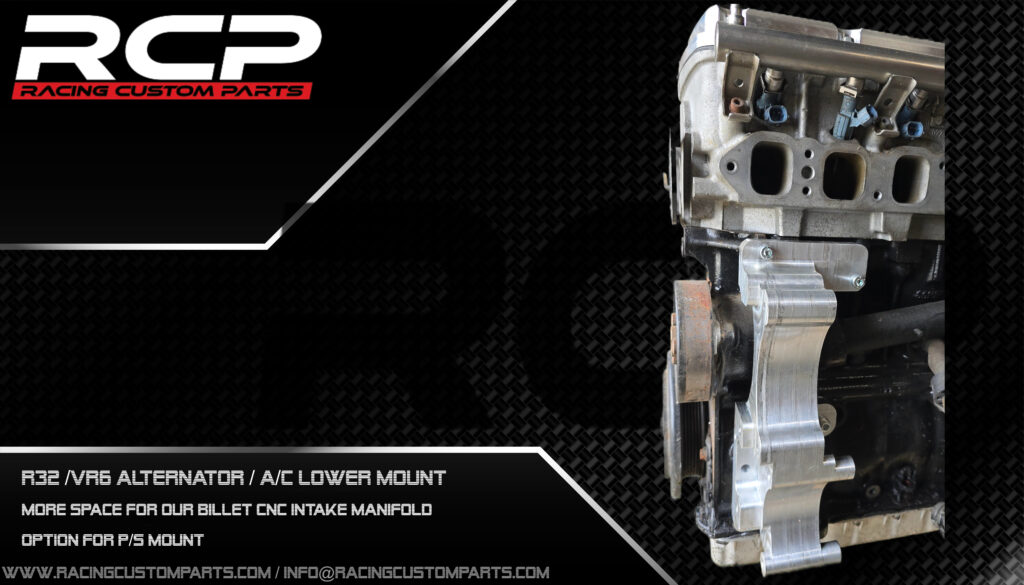
The kit required me to also design a new bracket for the alternator, air conditioning compressor, and optionally the power steering pump — but due to the mounting layout, it was simply necessary.
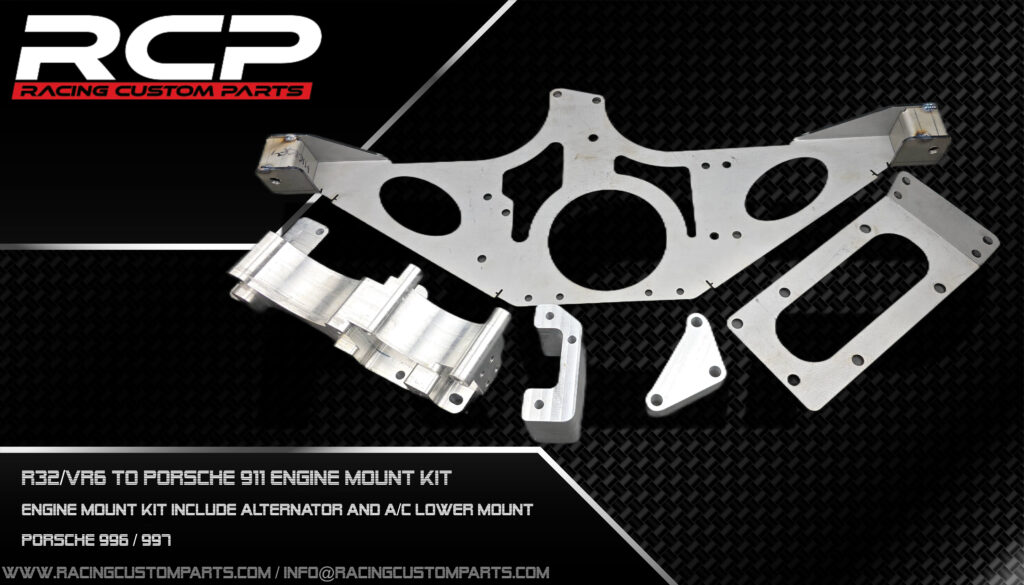

Lowered bracket for the alternator, air conditioning compressor, and power steering pump (available as an option, or simply as an idler pulley).
Lowering the alternator is also necessary when installing the intake manifold, which we’ll get to later (it was already visible in the model).

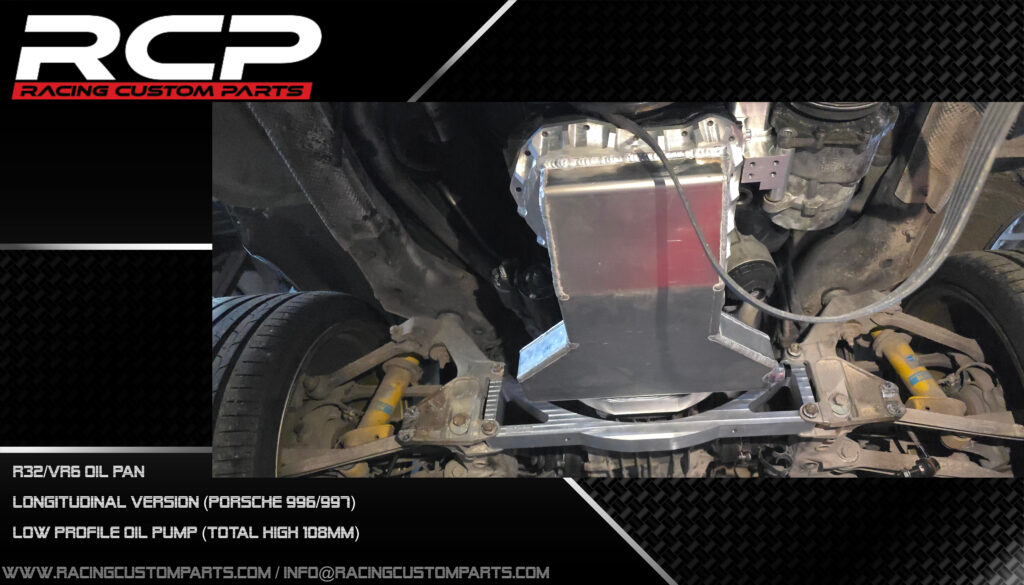
In the case of lowering the gearbox to this extent, it is necessary to replace the lower cross brace that connects the suspension from the left to the right side. This component can also be used with other engine setups — for example, when installing an LS3 engine, which is very popular in the USA.


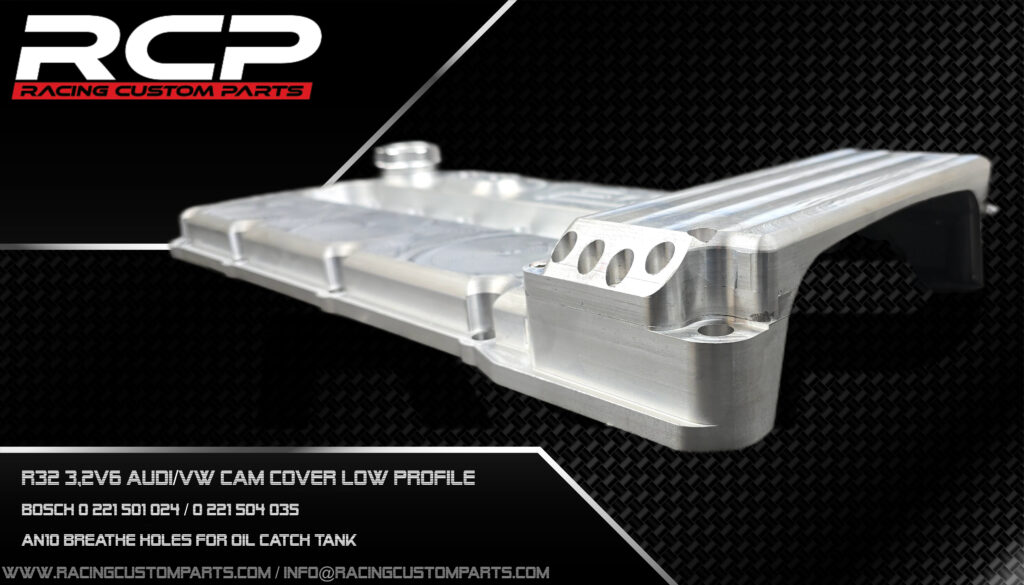
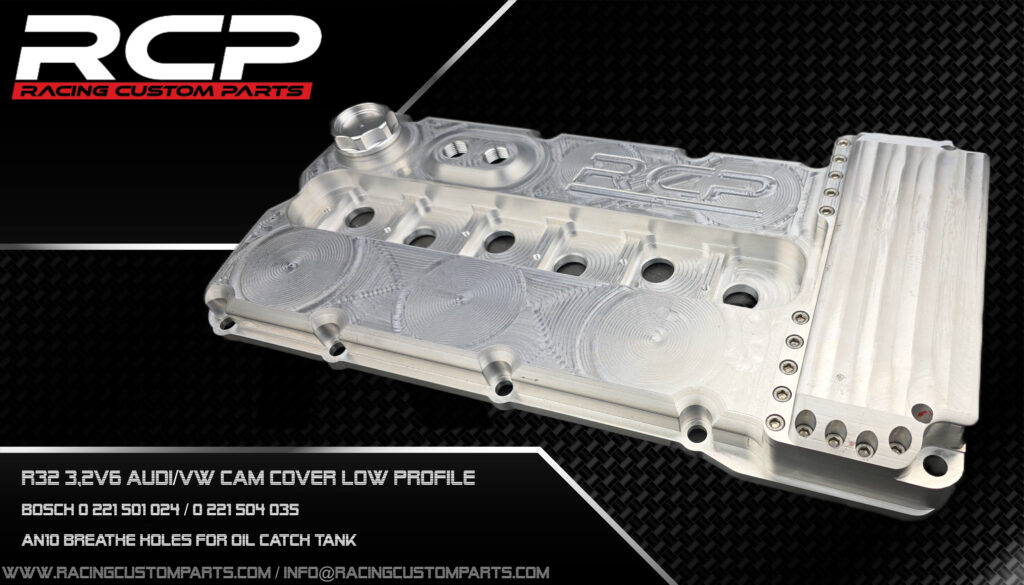
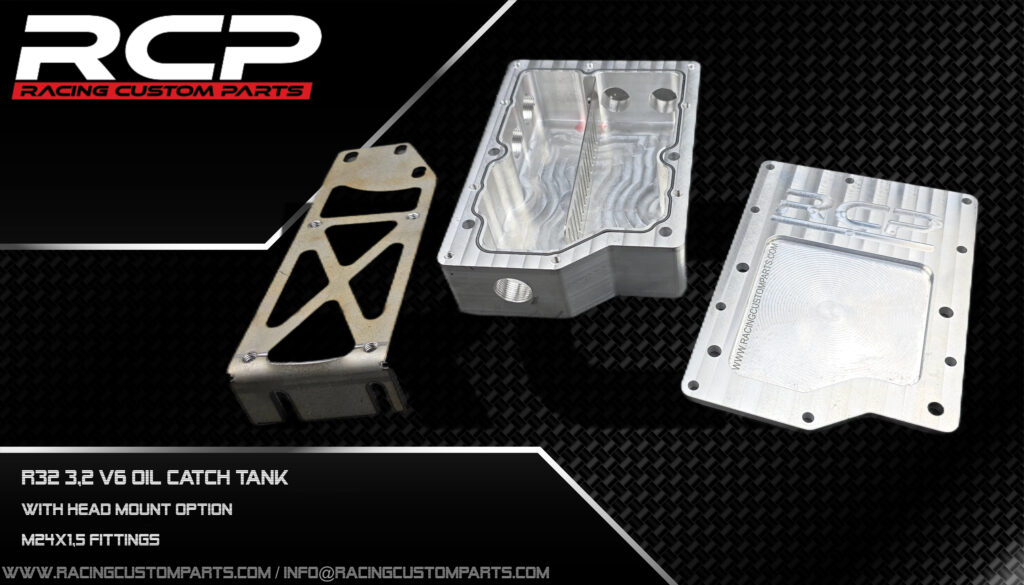
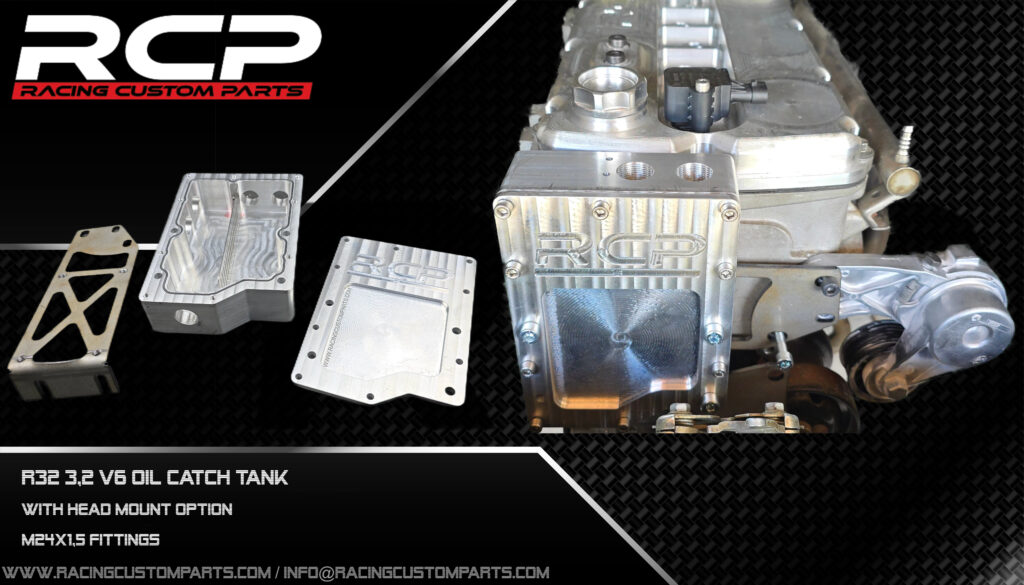
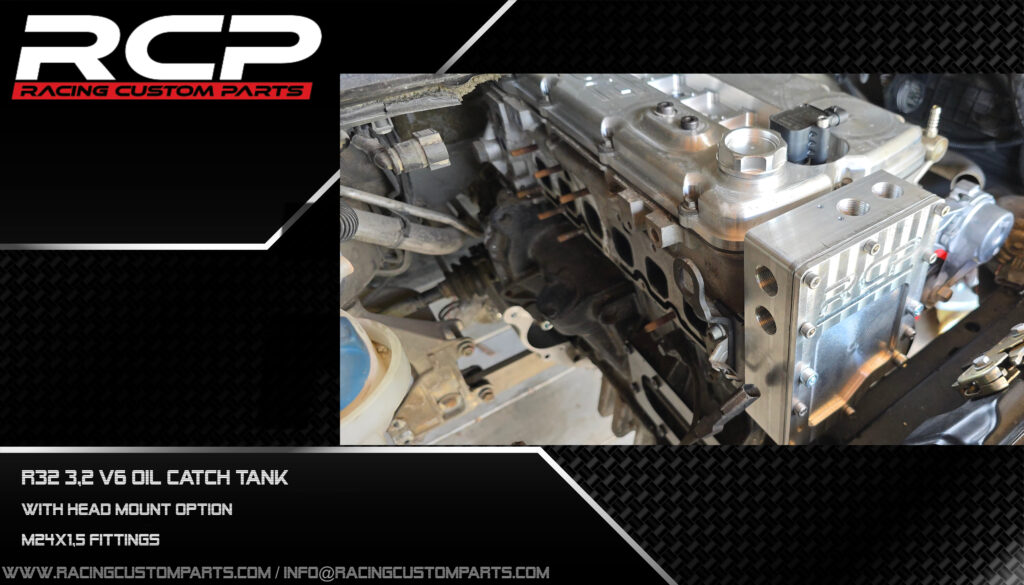
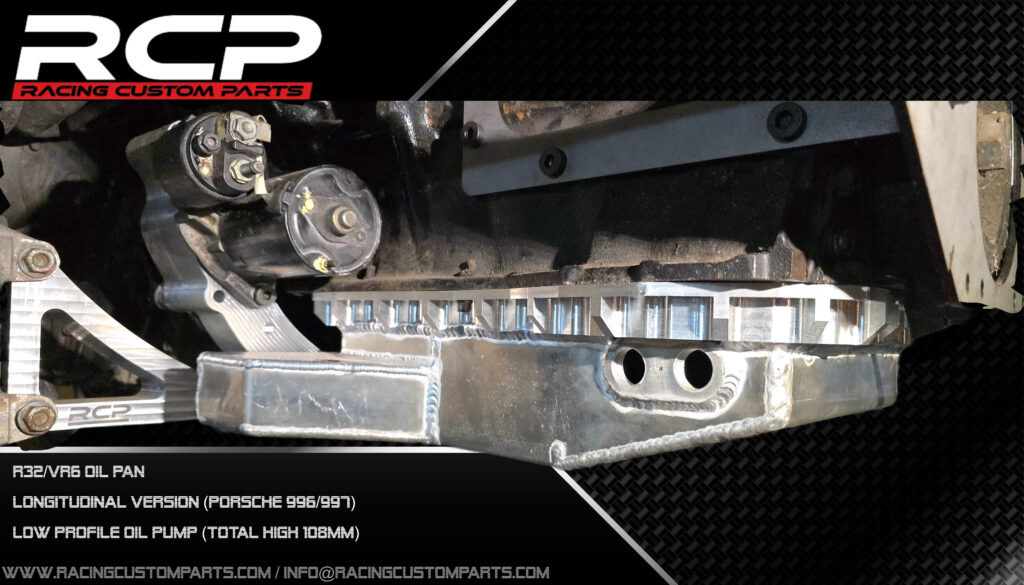
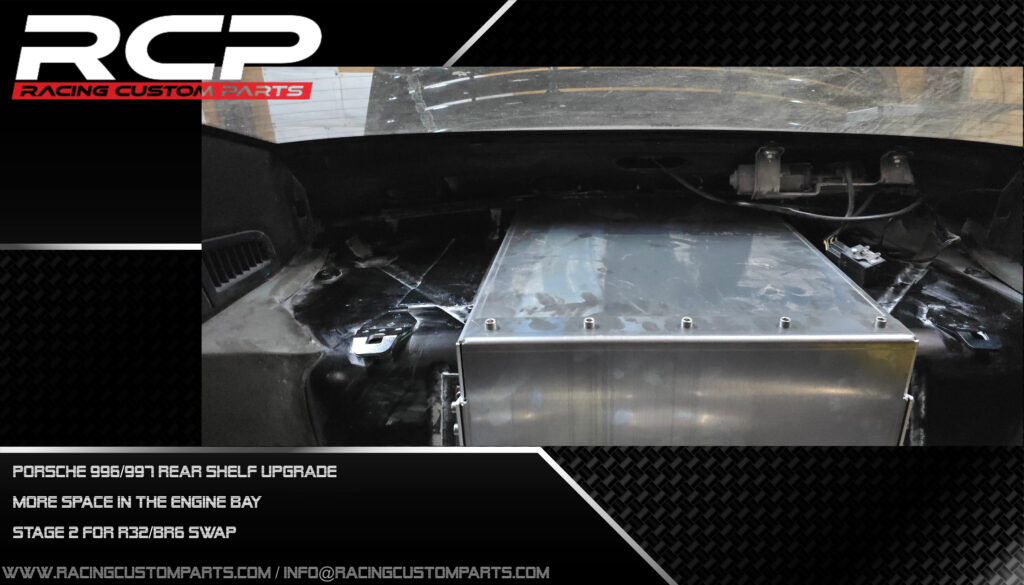
Optionally, you can use a specially designed crankcase breather tank (oil catch tank) made specifically for this vehicle. It mounts directly to the engine head and features both the oil feed and return on the same side as the oil pan and valve cover.
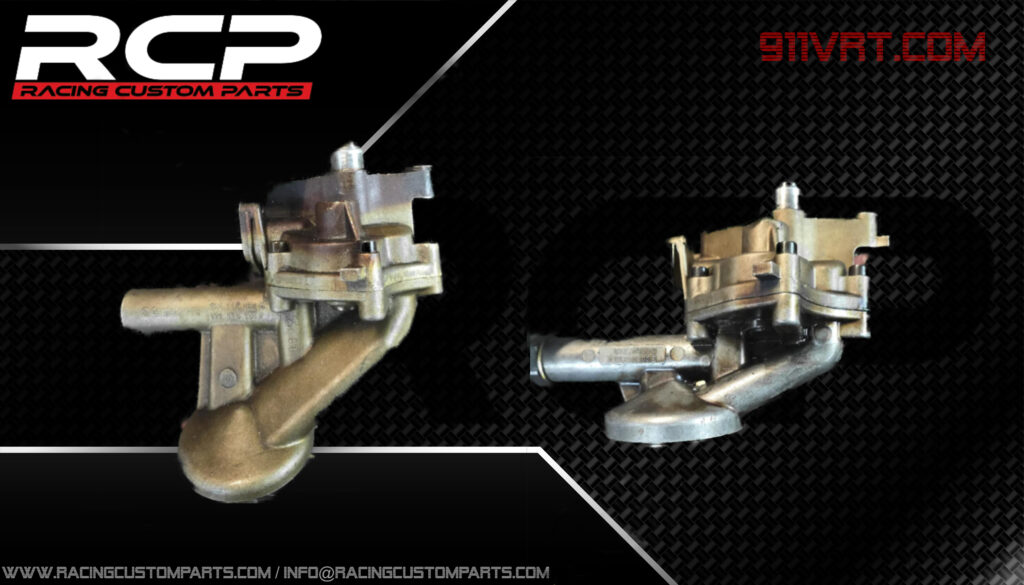
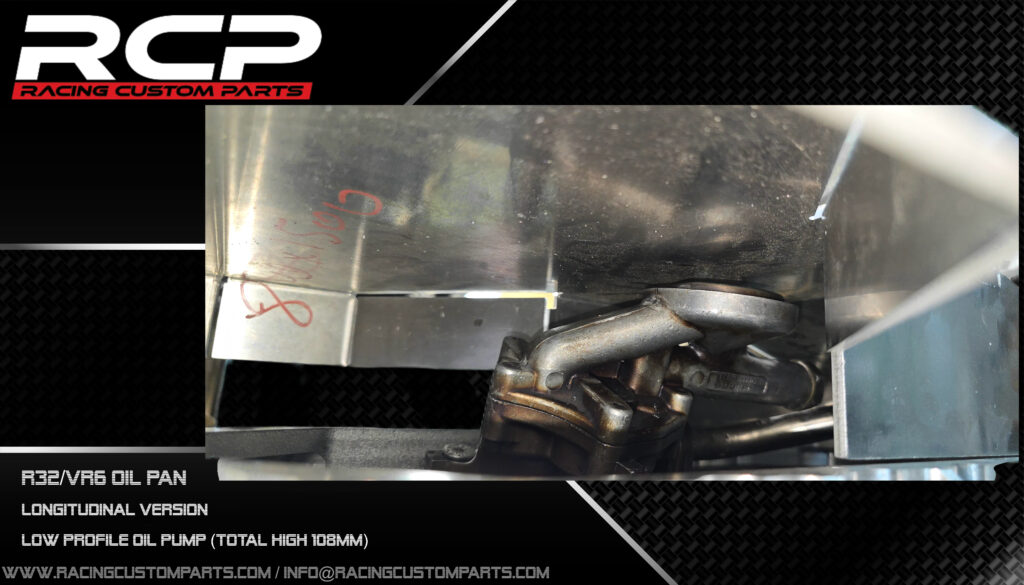
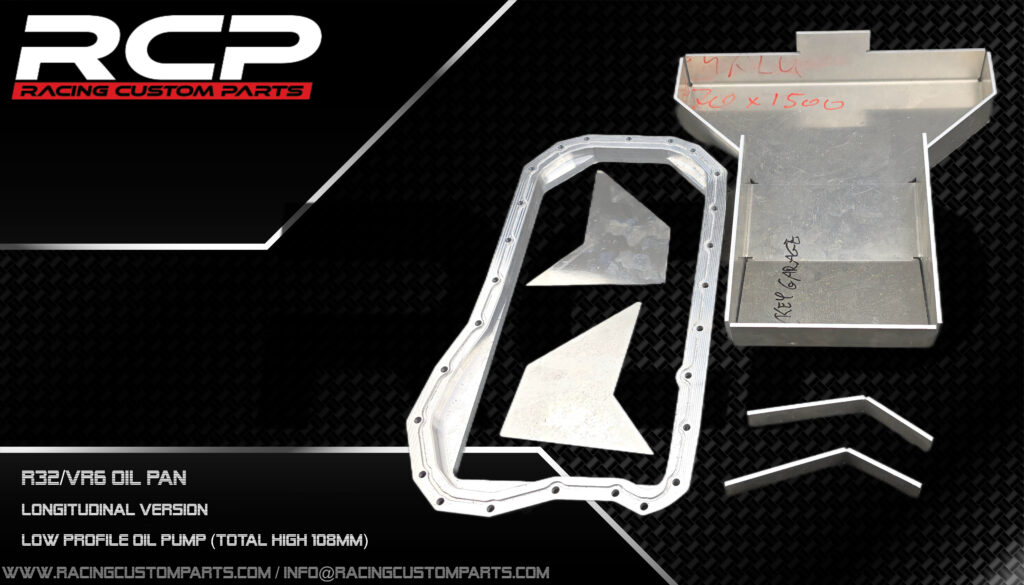
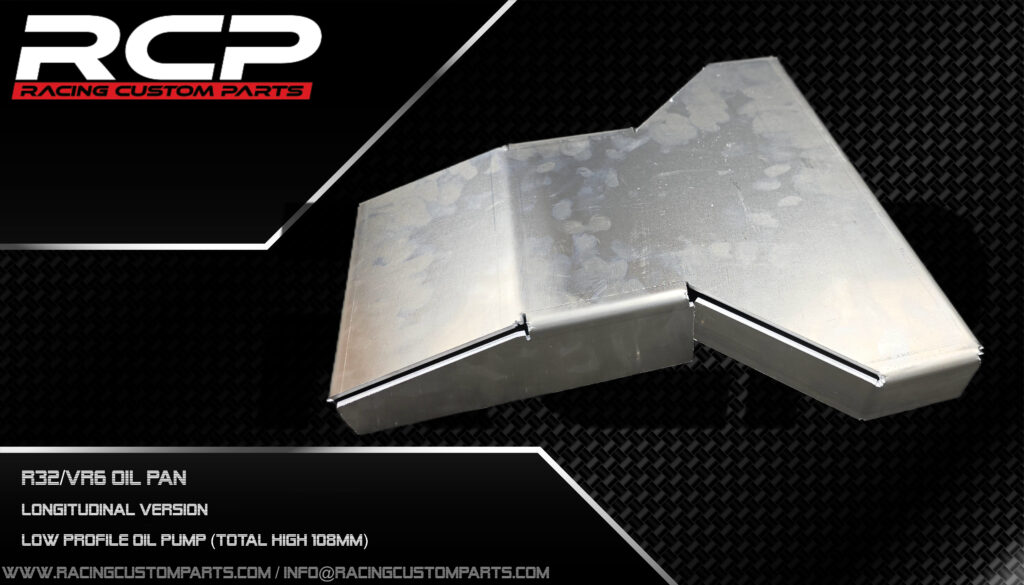
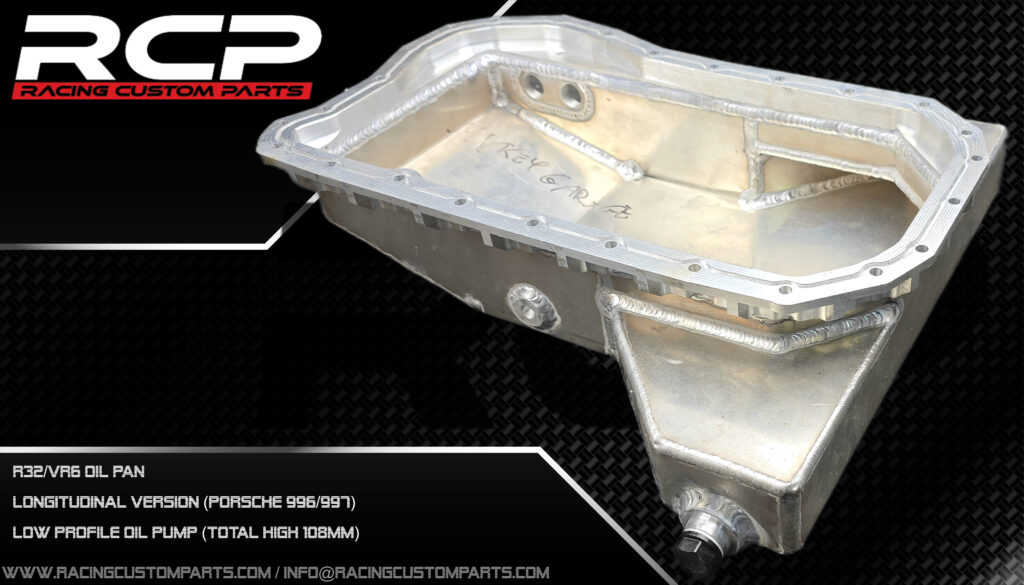
The next component is the oil pan, designed in a version for self-welding. However, if needed, a fully welded version can also be ordered. An important detail is that R32 engines come with different oil pump heights. By default, the oil pan is made for the pump from the BUB engine series — which uses the shallowest pan and the shortest pump. Unfortunately, the pumps share the same part numbers, so I can’t specify exactly which one to buy — just the one from the BUB engine.
The second option is to create a custom version of the pan to fit a taller pump (I just need the height measurement, and then it’s not a problem).
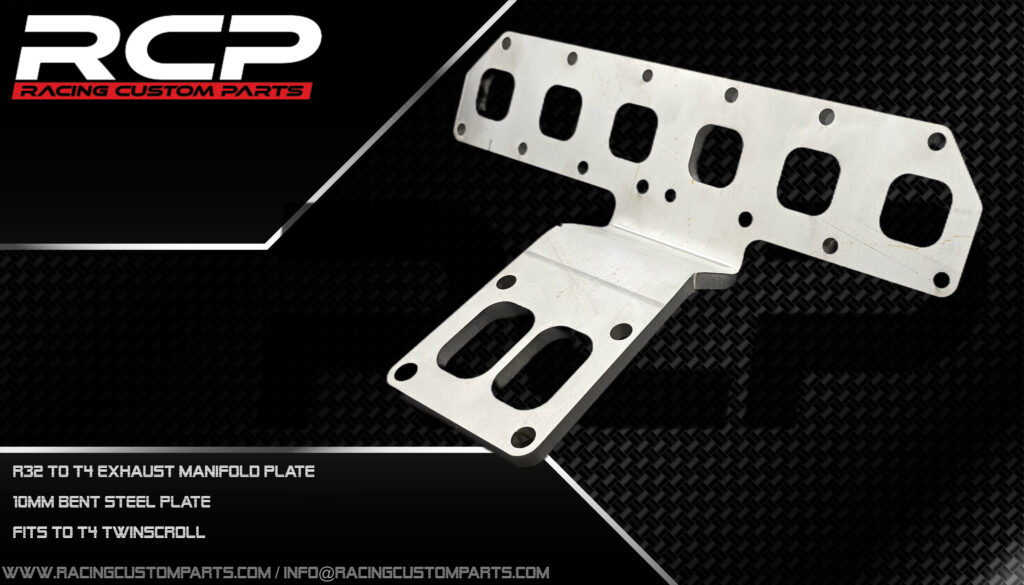
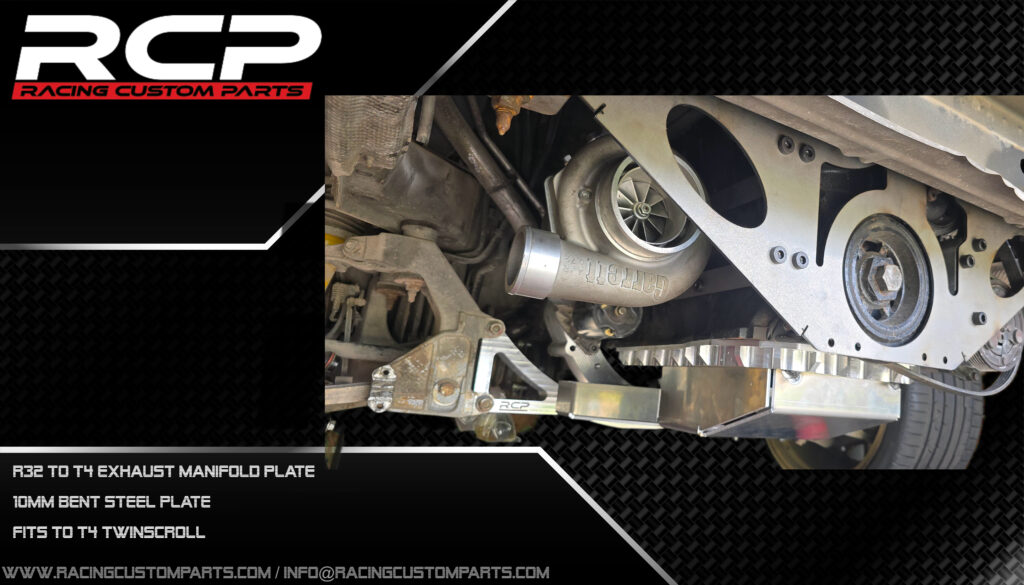
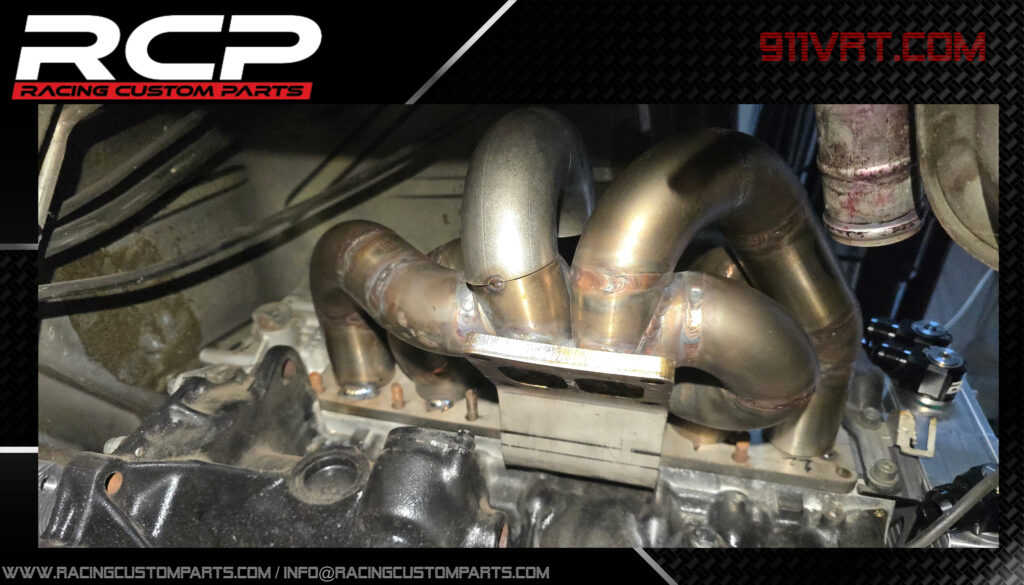
A special exhaust manifold flange was also created specifically for this project. It’s made from a single piece of material and then precisely bent to fit together with the GTX3884RS turbocharger (note: this turbo is equipped with an aftermarket hot housing featuring a T4 Twinscroll flange).
Based on this flange, it’s also possible to build a complete exhaust manifold — it’s currently in progress, but some photos are already available.
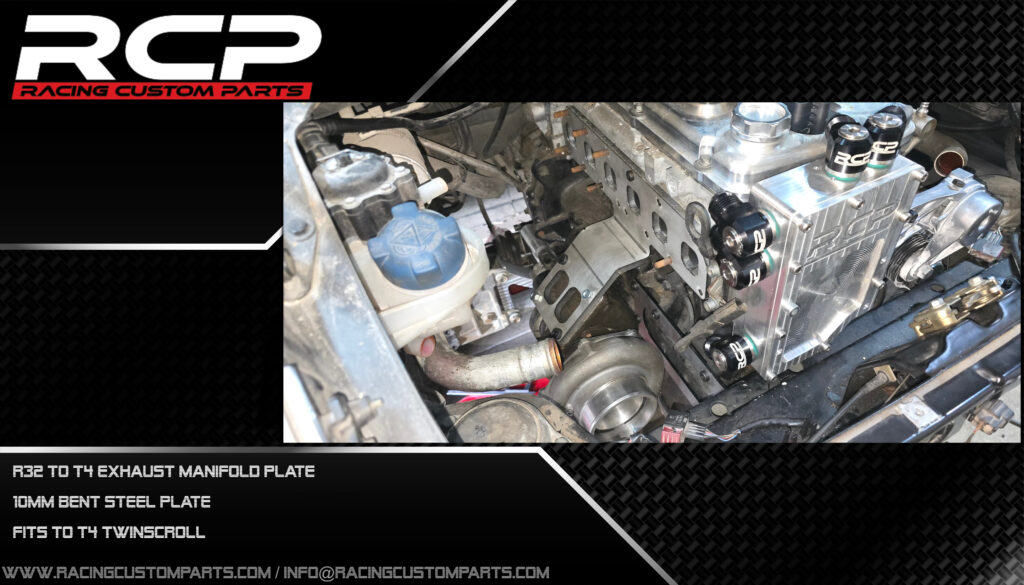
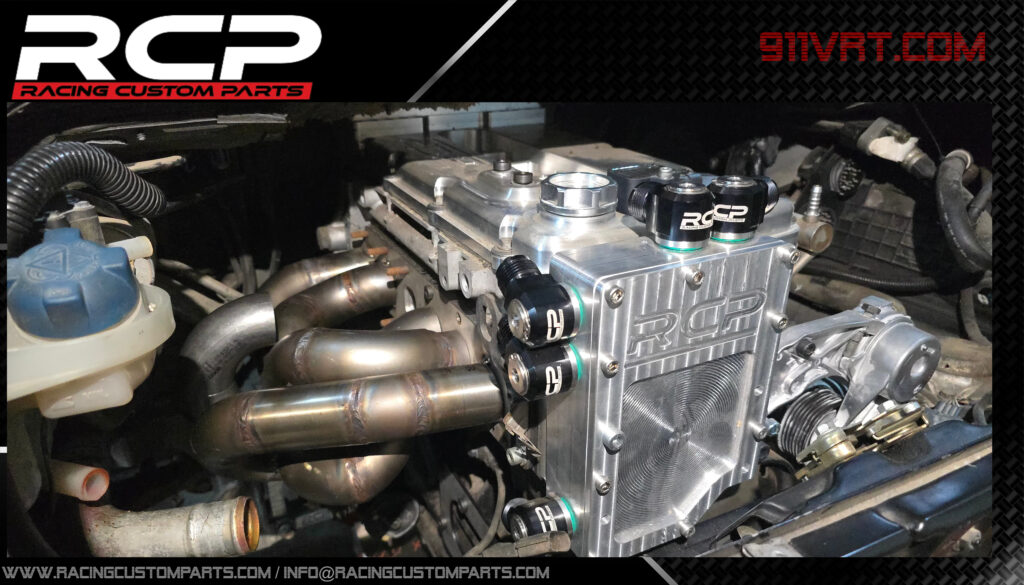
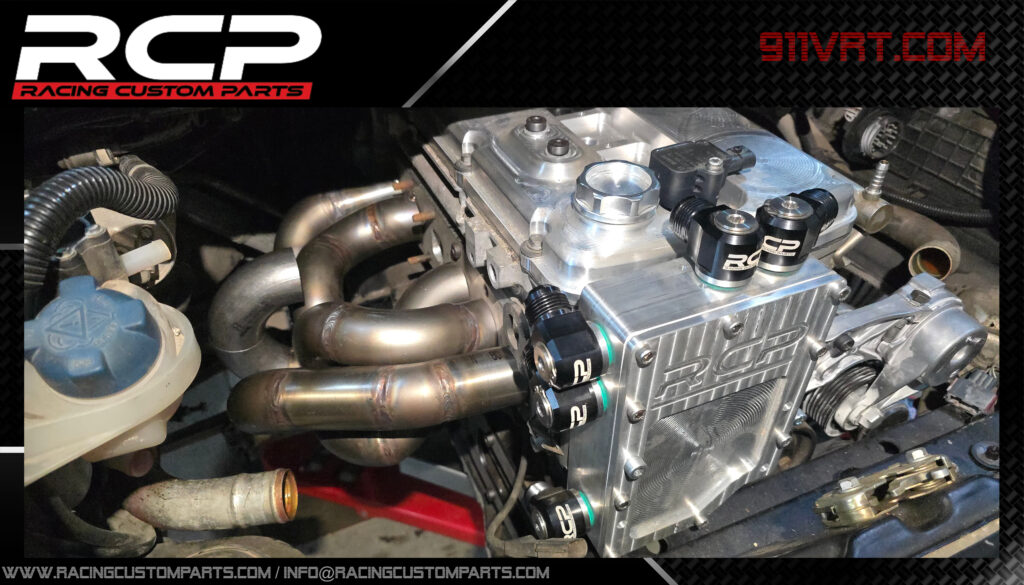
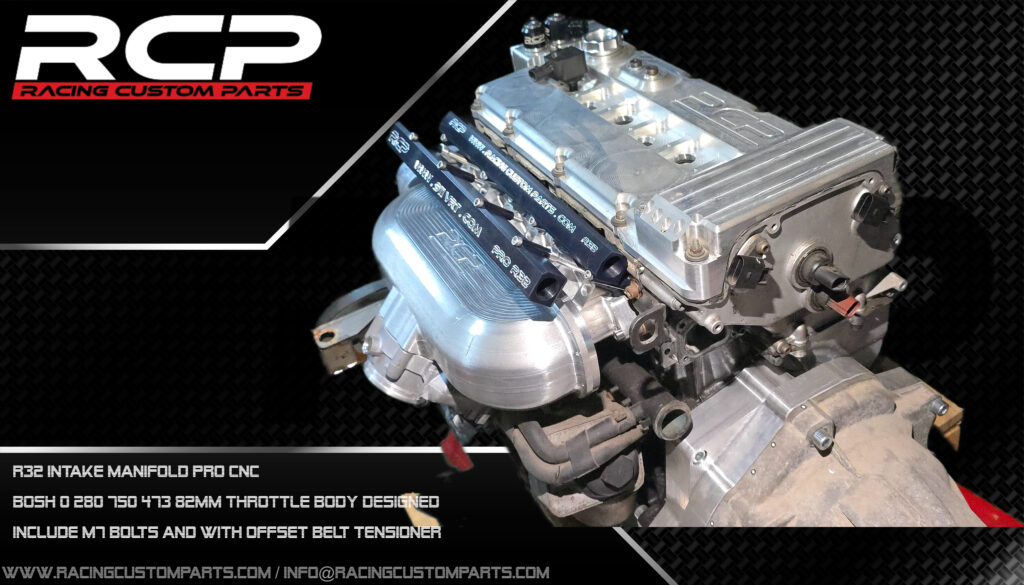
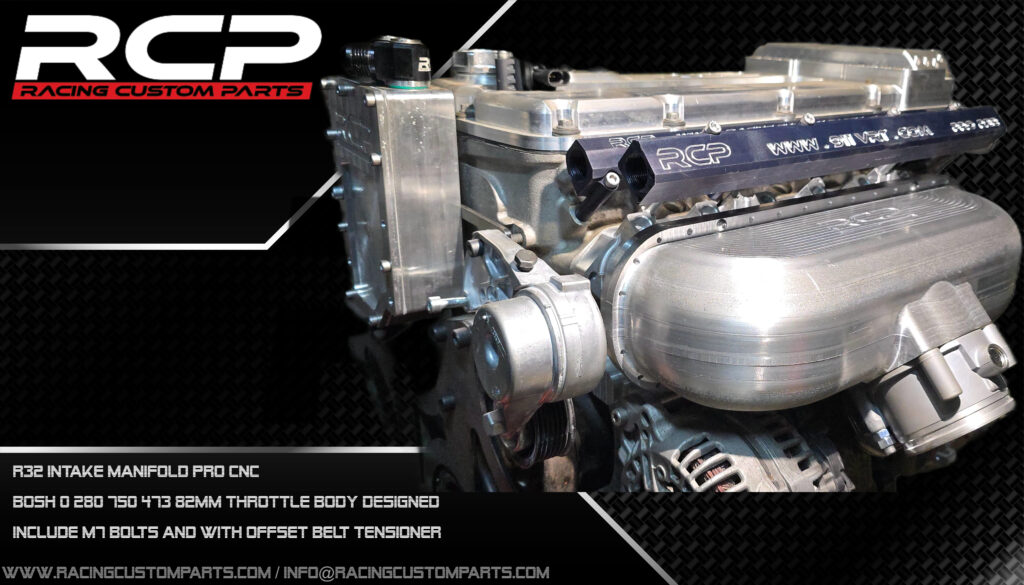
For this project, the intake manifold was also modified — it’s the same one that has been available on our website for some time for transversely mounted R32 engines.
This time, it has been developed in three versions:
- with the throttle body outlet to the side,
- straight down,
- and at a 45-degree downward angle — the latter being the one used in this build.
However, all three versions are available on our website. (real photos soon)


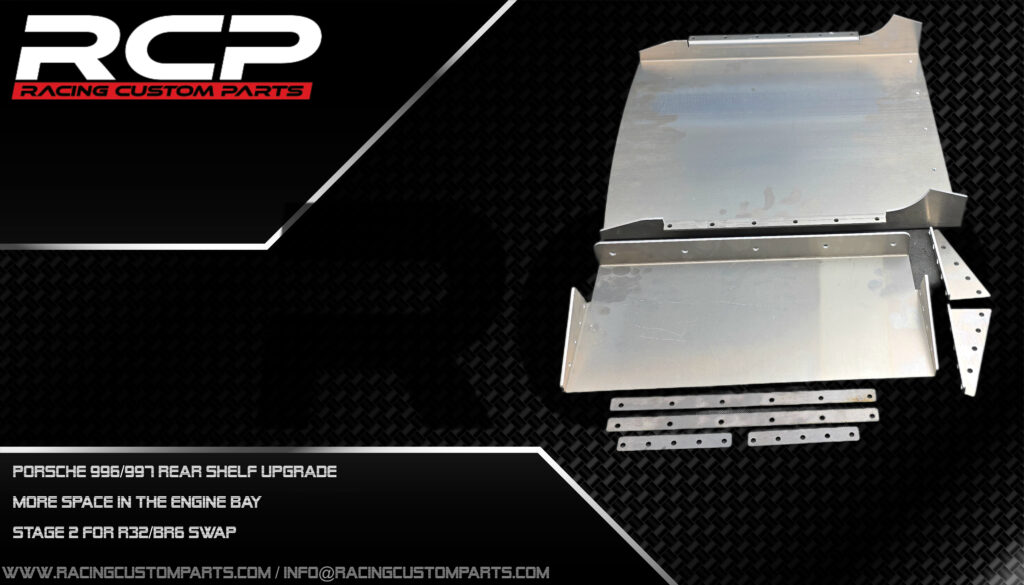
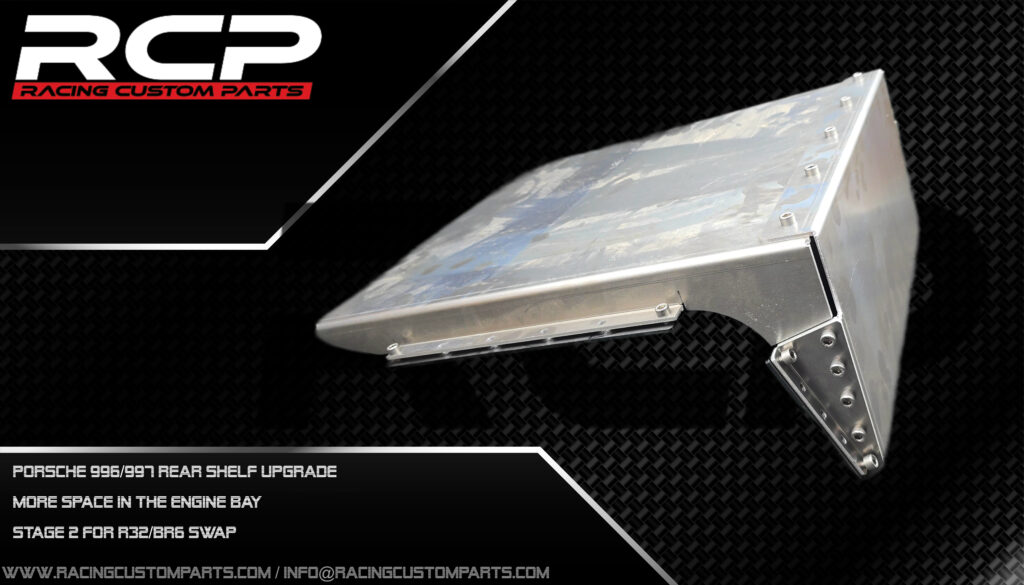
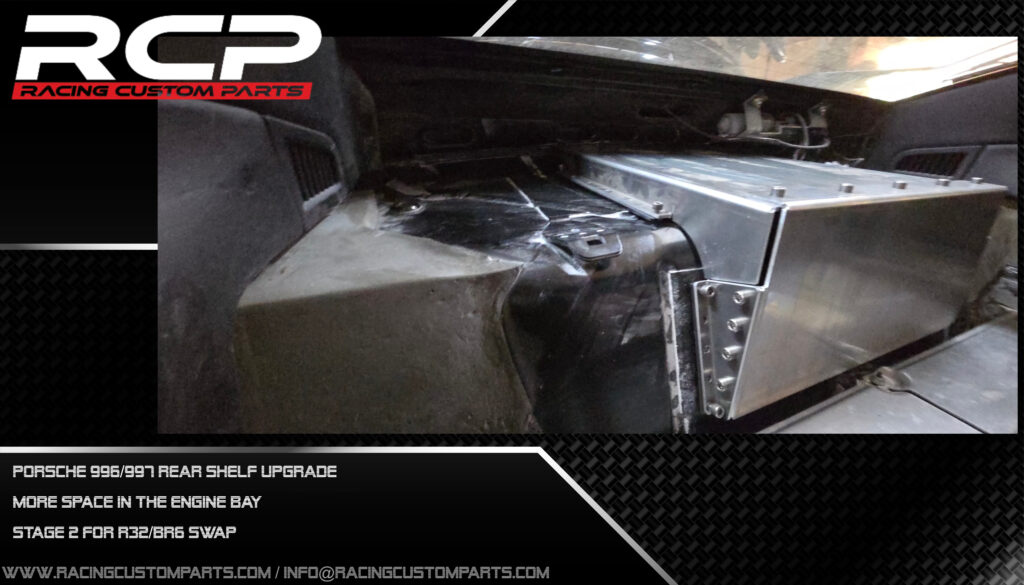
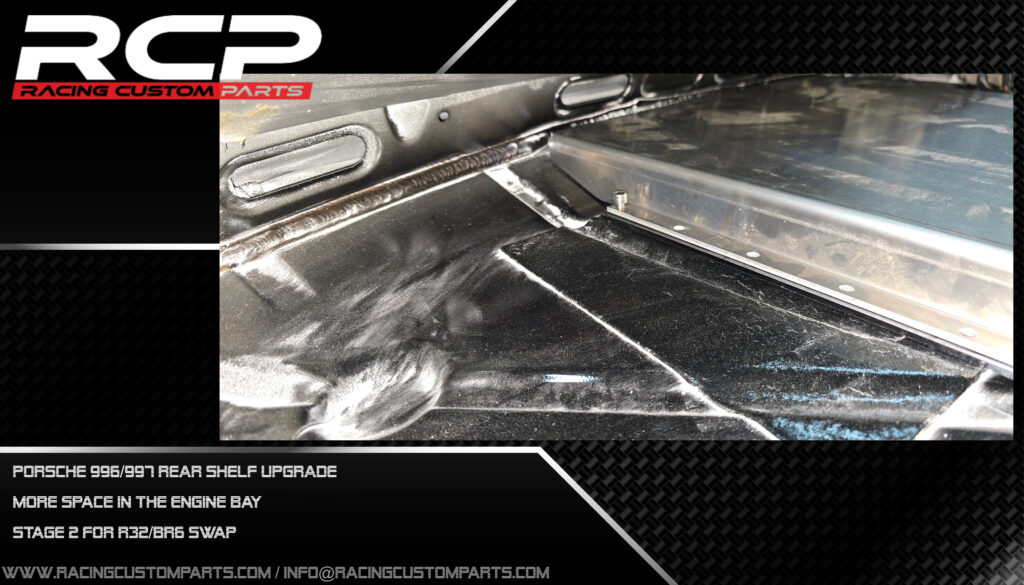
As mentioned earlier, lowering the engine like this creates problems when using the all-wheel-drive system. However, since this particular car is already waiting for rear fender modifications (replacing them with the Turbo version featuring air intakes for the intercoolers), cutting the rear shelf and raising the engine is not an issue in this case.
For this purpose, we designed a weld-in revision panel kit, which can later be opened for easy access.
That’s all for now — new photos will be published here as soon as they become available. I’ll include a list of all the parts at the top, so you won’t have to scroll down through the entire text each time. Cheers!
Update 13.12.2025:
The intake manifold is finished and currently waiting on the engine for the rest of the car, which is undergoing visual changes. The body will be slightly wider and will provide space for the intercoolers required for this project.


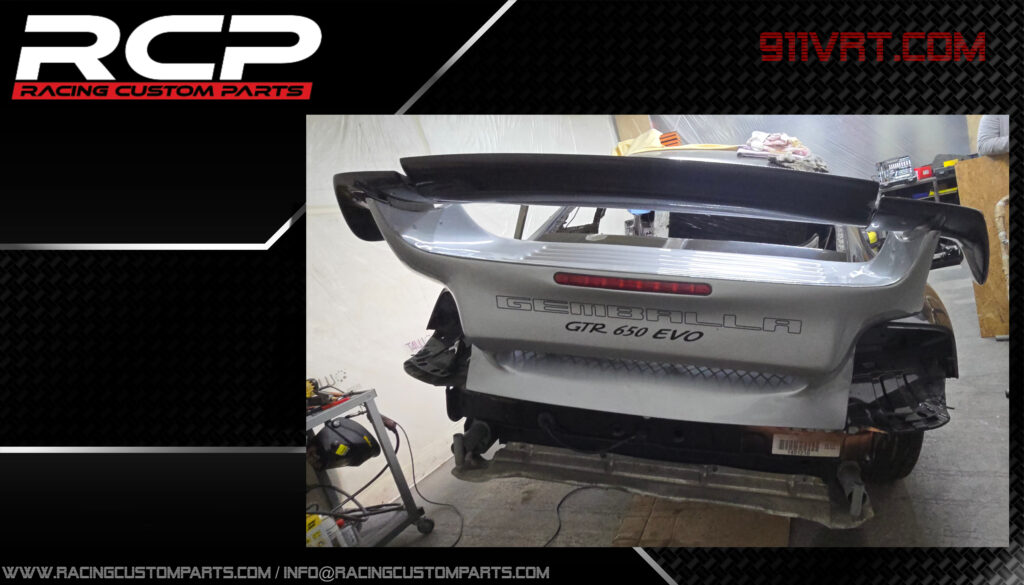
Update: 23.02.2026
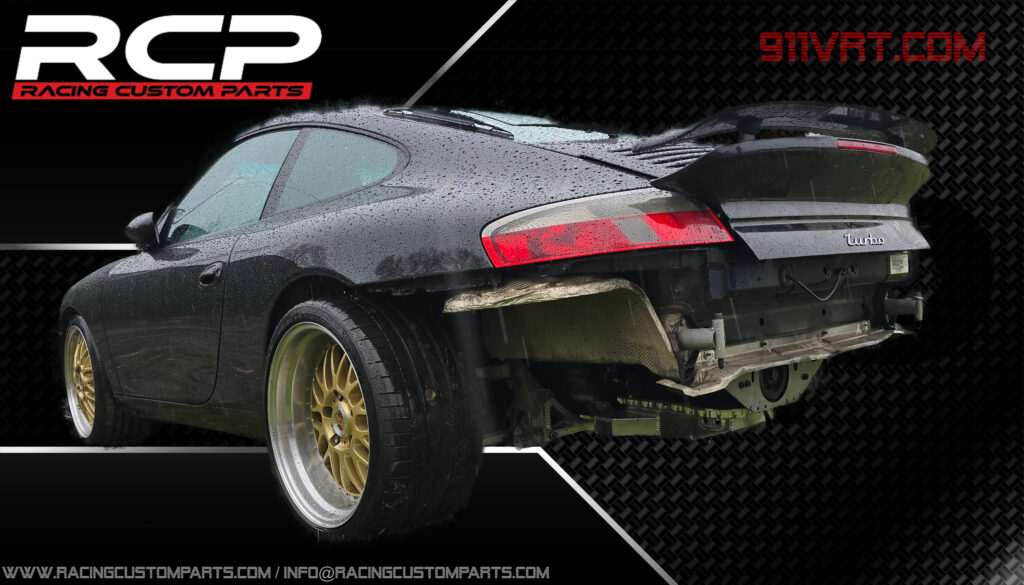
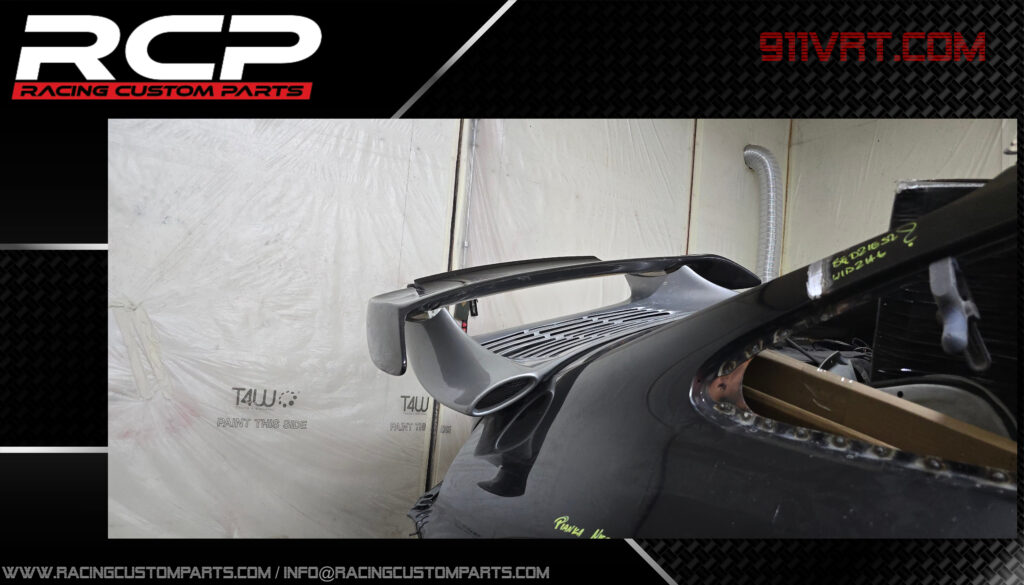
Unfortunately, we have to hold off on the engine installation and further power mods for a bit. Our Carrera 4 is currently undergoing a major styling overhaul.
Originally, the plan was simple: a genuine Turbo body kit. However, we happened to come across an authentic Gemballa decklid, which completely changed our “standard Turbo” vision. We have no regrets, though – that spoiler is definitely going to make the car even more unique.
Here are a few photos of the progress. We hope to have the engine back under the hood within a month, so we can finally start designing the custom intake and exhaust systems.


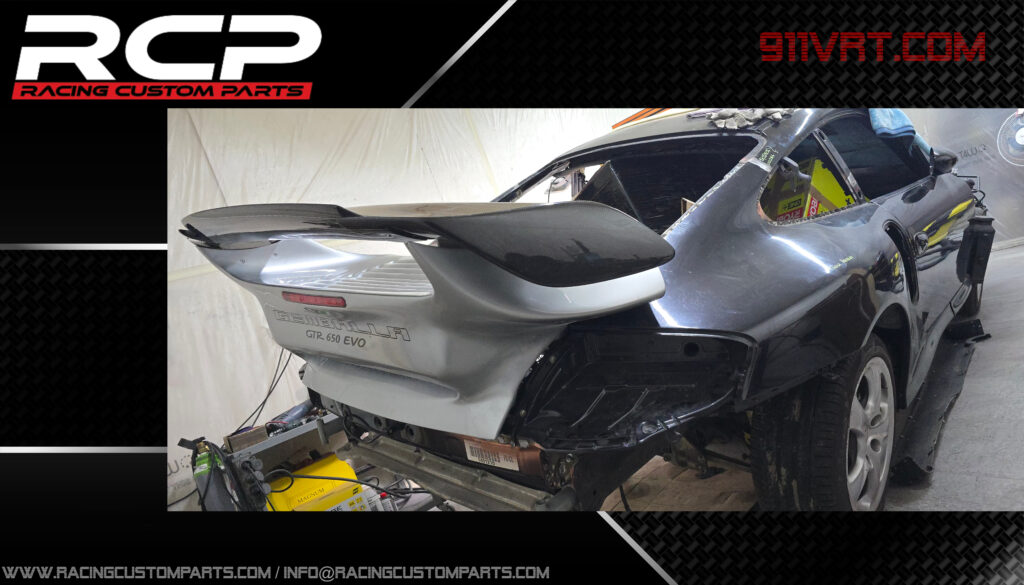
Naturally, such a bold rear end forces changes to the front. We already have a general plan, but we’ll wait to show it until everything starts coming together. For now, I’m a bit worried that the wheels we bought for the standard Turbo body might not fit the new style anymore—but I’ll make the final call once the bodywork is complete.
Racing Custom Parts
Konrad Zakrzewski.